Please use the link above as I had a problem where Blogspot would not allow me to post the video on my blog directly.
Friday, 6 June 2014


Workflow: Time Management
Time management took a very big role in this term's project. Last term I found myself with the weight of the world on my shoulders as I typically left everything until the very last minute. I knew that this project would be time consuming, and combining that with the fact that I was determined to outdo myself and improve of the performance of last term, I became much more organised and concious of my time.
Our tutor kindly provided us with a schedule of work and what is expected from the class for each week until the end of term three. On our first session I saved the PDF and printed out a copy to stick on my wall at home. This gave me a constant reminder of where I should be at in terms of my work, and I found this extremely helpful in making sure I did not fall behind the rest of the class.

I successfully managed to keep on track with the schedule by being disciplined with myself and knowing how to separate free time and work efficiently. I got into a routine of relaxing, socialising and exercising until 4-5pm, I would then eat dinner and then sit down and use the rest of the evening for work. I turned this into a daily routine, with the exception of the weekends, otherwise using them to catch up on work that wasn't complete. I found this process to be very successful and it worked very much in my favour.
One time when my time management became complicated was during week 6/7 when I had a formative with my tutor. I had started my work using a certain piece of dialogue that I realised was not suitable the night before presenting to my tutor. That night, I changed my audio clip and decided to allow my tutor to approve for me to go ahead with it before I committed to it. This meant that after my formative I had some catching up to do, however within a few days, I was back on schedule.
I am proud of my time management this term and I feel as though it has benefited both me and my work.
Workflow: Camera and Lighting
The last part of my workflow timeline was to create light and set cameras within my scene. The two elements combined add a sense of narrative to the scene; they can also exhibit a desired emotion and visually speak to the audience through it.
I first researched into existing media to give myself an idea of the conventions of film and particularly my genre. It only made sense to begin by looking at the footage I took the audio from.


'Interview with an Applicant'
Light
The shots are lit enough for the audience to see the action on screen but are not overexposed. The light gives off an almost clinical feel; by that I mean the lighting is fairly drab and 'plain'. This works well in favour of the content as the office environment the characters are in is quite mundane. The shadows cast aren't harsh or very dark and the lights are colour graded to be a bluey grey colour, again giving off a 'boring' atmosphere. This works well to set the scene for a dull everyday activity such a job interview, tricking the audience into believing this by emitting a particular emotion in the way the light is used; this allows the comedy to make more of an impact and surprise the audience, allowing the humour to be the shining feature of the film.
Camera
The camera is used in a similar way also, in terms of the emotion it conveys. The whole scene is mostly comprised of over the shoulder shots and sometimes quick cuts to the next character to show a reaction to a certain line. As the two are sitting and not much action is happening on screen, I think this camera work has benefited the piece. It keeps the scene simple and easy to understand for the audience; it gives way for the acting to take centre stage.
Next, I looked at other examples:


'Step Brothers'
Light
The lighting in this scene varies a little from the previous example. As well as the studio lights that would have been used there is also a lot of natural light and artificial light also in the form of lamps dotted around the set. This adds more of a warm and light-hearted feel to the scene whilst remaining in the environment of a formal job interview. This lighting works particularly well in this scene as it is driven by humour and the lighting is comfortable and homely, making the audience feel at ease.
Camera
The camera work, again, is standard for the type of scene. A running dialogue between parallel characters almost always calls for the typical over the shoulder shot. The audience is accustomed to this type of camera shot and so it is a film fail-safe. Every now and again however, the camera cuts to a shot that is placed much farther away from the action, showing all the characters in the frame and some elements of the environment around them. I assume this is because there is more that two characters within the scene and it is a good way of establishing the relationship of the three.


'Good Will Hunting'
Light
The lighting in this interview scene is very different from the two others. There is a strong orange gradient over all of the shots giving the impression that it isn't the typical interview. The intensity of the light is fairly dim- Even though there are windows letting in natural light, the yellow tones overpower all other light sources in the scene. The warm colour denotes happiness and so can suit the comedy genre, acting as a more obvious metaphor for emotion.
Camera
The camera work in this scene is very unique as there is none of the usual back and forth and over the shoulder shots for the dialogue. Instead, the camera pans and rotates around the characters in a spherical motion. This captures the actions and reactions from every angle, giving the audience full exposure to the environment and the acting of the characters.
I decided to use over the shoulder shots for my scene to keep it traditional and easy to understand. As I am not the most experienced animator I figured keeping the scene simple would work the best in my favour meaning that the audience can feel comfortable and at ease when watching my piece. The camera work is quite passive in that it gives the audience the information without any fuss or complication; they can easily take in and understand the information I will be creating and broadcasting.
I wanted to use natural indoor lighting that was mellow and not too harsh. I wanted to replicate that plain office atmosphere as I felt it would work best for my scene, allowing the dialogue to do the work. Unfortunately, I could not find a suitable lighting. I played around with spot lights, area lights and global illumination amongst others, but more than often it would bleach out my scene, destroying the detail of the character's facial expressions and lip-sync. Therefore, I decided for my render I would purely focus a single, not too intense, spotlight on each character to show the character performance. Unfortunately this meant that my modelling of the room, door and table would be less detailed and prominent. However, I decided that the character performance was worth highlighting more so than the environment.
The camera is used in a similar way also, in terms of the emotion it conveys. The whole scene is mostly comprised of over the shoulder shots and sometimes quick cuts to the next character to show a reaction to a certain line. As the two are sitting and not much action is happening on screen, I think this camera work has benefited the piece. It keeps the scene simple and easy to understand for the audience; it gives way for the acting to take centre stage.
Next, I looked at other examples:
'Step Brothers'
Light
The lighting in this scene varies a little from the previous example. As well as the studio lights that would have been used there is also a lot of natural light and artificial light also in the form of lamps dotted around the set. This adds more of a warm and light-hearted feel to the scene whilst remaining in the environment of a formal job interview. This lighting works particularly well in this scene as it is driven by humour and the lighting is comfortable and homely, making the audience feel at ease.
Camera
The camera work, again, is standard for the type of scene. A running dialogue between parallel characters almost always calls for the typical over the shoulder shot. The audience is accustomed to this type of camera shot and so it is a film fail-safe. Every now and again however, the camera cuts to a shot that is placed much farther away from the action, showing all the characters in the frame and some elements of the environment around them. I assume this is because there is more that two characters within the scene and it is a good way of establishing the relationship of the three.
'Good Will Hunting'
Light
The lighting in this interview scene is very different from the two others. There is a strong orange gradient over all of the shots giving the impression that it isn't the typical interview. The intensity of the light is fairly dim- Even though there are windows letting in natural light, the yellow tones overpower all other light sources in the scene. The warm colour denotes happiness and so can suit the comedy genre, acting as a more obvious metaphor for emotion.
Camera
The camera work in this scene is very unique as there is none of the usual back and forth and over the shoulder shots for the dialogue. Instead, the camera pans and rotates around the characters in a spherical motion. This captures the actions and reactions from every angle, giving the audience full exposure to the environment and the acting of the characters.
I decided to use over the shoulder shots for my scene to keep it traditional and easy to understand. As I am not the most experienced animator I figured keeping the scene simple would work the best in my favour meaning that the audience can feel comfortable and at ease when watching my piece. The camera work is quite passive in that it gives the audience the information without any fuss or complication; they can easily take in and understand the information I will be creating and broadcasting.
I wanted to use natural indoor lighting that was mellow and not too harsh. I wanted to replicate that plain office atmosphere as I felt it would work best for my scene, allowing the dialogue to do the work. Unfortunately, I could not find a suitable lighting. I played around with spot lights, area lights and global illumination amongst others, but more than often it would bleach out my scene, destroying the detail of the character's facial expressions and lip-sync. Therefore, I decided for my render I would purely focus a single, not too intense, spotlight on each character to show the character performance. Unfortunately this meant that my modelling of the room, door and table would be less detailed and prominent. However, I decided that the character performance was worth highlighting more so than the environment.
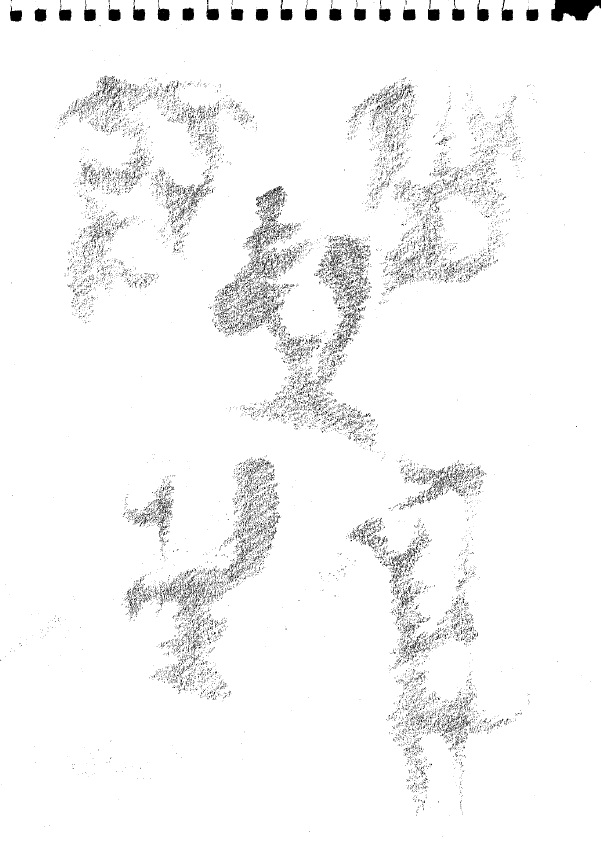


Life Drawing: Female Character Exercise

(The drawings below did not show up in the scanner, so I had to take some quick low quality pictures)


Filmic Language: Animatic
To create this animatic, I cropped the images from my storyboard and placed them in a sequence in time with the dialogue for my piece. This will provide a rough outline and a good guide for my animation.
Filmic Language: Storyboard
I used my personal reference footage to create a storyboard. I went through the videos and paused at certain poses that I liked and felt as though they expressed each moment of the dialogue well. I kept the design of my storyboard simple and grey scale so that it was simple to understand. I had received criticism in the past from tutors, saying my storyboards were far to detailed for this stage of the production, so with that in mind I made sure to keep it simple, bold and legible. I used red arrows to indicate a change in movement and I used small symbols such as '?' and '...' to depict confusion and shock.
.jpg)


Next, I will use this storyboard to create an animatic. That way I will be able to visualise how each movement and camera shot would fit within the scene and the timing of the dialogue.
Acting: Character References
I was puzzled at how to begin animating my characters as there are so many ways to interpret a piece of dialogue, and due to the nature of my piece it needed to seem natural and not too exaggerated or unrealistic. Therefore, I decided the best way to understand how to deliver the lines naturally was for me to deliver them myself. I set up a camera on my desk and filmed myself multiple times for each character. I chose my top two pieces of footage for each character for my blog to show what reference I was using to better grasp how to animate the scene.
First of all, I played the dialogue and reacted without speaking to the words. This allowed me to understand the emotion of the piece and forced me to think about body language more when I can't rely on the dialogue to convey my message. I found this to be useful as I didn't rehearse beforehand and just threw myself into the role of each character- this allowed me to react naturally to the lines.
Firstly, I did this as the interviewer:
And then as the interviewee:
After this, I turned the audio off and had the script breakdown on the screen in front of me. I read off a small section of lines at a time, in juxtaposition to the previous exercise where my body took control of the scene. Here it was all about how I delivered the dialogue. I found that as I was speaking the lines, my body naturally reacted to the words. I also tried each line multiple times in a variety of interpretations. This allowed me to think outside of the box and understand the motives of the characters a lot more.
Again, firstly I spoke the lines of the interviewer:
And then the interviewee:
Although at first I was embarrassed to film myself and act the lines out, I realised that this is an invaluable reference that I will use to make my character performance better, more believable and true to life.
Wednesday, 21 May 2014
Chosen Audio Clip: Character Synopsis
I decided to first identify the clip I intend to use before creating my characters with the Morpheus Rig. I didn't want to create my characters firstly, and then fall short on the quality of the clip because I've limited myself to a specific criteria of character. I am happy with my chosen audio piece and therefore began constructing what characters I imagine would be in such a scenario.
The interviewee character has a very youthful and quirky voice, therefore I decided to create a young adult female character for her part. The interviewer character has a voice that is far more mature and authoritative and therefore I imagined her character to look older in appearance than her co-star.
The chosen clip does not make much sense to an audience on its own as it is just a small section taken from a whole scene between the two women. Therefore I thought it would be best to create my own character synopsis for the main character to imagine my own scenario and unique take on the scene. I've decided not to write a character synopsis for the interviewer character as she has limited number of lines which only act as a contrasting rebound and driving force to the big personality and comedy of the first character.
Character 2 (Interviewee)
Born into a family of wealth, Character 2 has had a rather spoon-fed life. Living glamorously from her parent's generous allowance, she is a socialite who loves to have fun and doesn't take life too seriously. However, her mother and father have taken great care in giving her the best education to set her up for the future, knowing that some day she will have to stop relying on them and prove her own worth.
Quite the mathematician, Character 2 has a bright future ahead of her, although her lazy ways leave her at a disadvantage of becoming an independent adult and a working young woman. Her charm and cunning had kept her living comfortably thus far and safe under her father's radar, however the strain of watching their young party-girl put her knowledge and talents to no use had gone too far. In fear that she would not change her ways, her parents felt that the best thing to do was to cut her allowance and arrange a job interview for her in accounting.
Character 2 is happy the way things are, and she's not ready quite yet to leave it all behind. Reluctantly, and after much persuasion, the feisty heiress finally agreed to at least attend the interview, however she understood that this didn't mean she actually had to take the job. She is no stranger to getting what she wants and she knows that this time will not be any different. She will do anything, even sabotage the interview, so she can keep her perfect life.
Chosen Audio Clip: Dialogue Script/Audio Timed Breakdown
Character 1: I
have been uhm... looking over your resume and I have to say, I am
very Impressed.
0:12 - 0:16 (4 seconds)
Character 2: Oh,
thank you.
0:16 - 0:17 (1 second)
Character 1: You
know, actually I think, to be honest you are over-qualified to be an
accountant. (laughs)
0:17 - 0:23 (6 seconds)
Character 2: Oh
well that's okay, I don't intend to work very hard.
0:23 - 0:26 (3 seconds)
(3 second pause)
Character 1: Uh...
Really?
0:29 - 0:31 (2 seconds)
Character 2: Absolutely.
In fact, I only intend to show up when I feel like it. Which is good
because I have a wide variety of extremely annoying personal habits
and absolutely no sense of hygiene.
0:31 - 0:42 (11 seconds)
30 seconds total.
Chosen Audio Clip: "Interview With An Applicant"
I chose this short comedy sketch from Director Paul Del Vecchio for 'Triple E Productions'. It shows a moment of confusion and comedy between two female characters during a job interview. The section specifically that I am using begins at 0:12 seconds to 0:42 seconds, lasting exactly 30 seconds in total.
I chose this section in particular as it shows a clear change of emotion and character, and really turns a casual and 'normal' situation in to something unbelievable and funny. The interaction between the two women is a great moment and the voices are of good audio quality, clear and concise which is extremely beneficial to make the lip sync as simple and flowing as possible.
Below is the audio I will be using between 0:12 and 0:42 seconds:
Lip Sync: "You Feeling Alright There Phil?"
Our tutor gave us a short audio file of a male voice saying "You feeling alright there Phil?" We were given the Morpheus Rig head to work from and were required to alter the shape of the mouth whilst using the audio file on the Maya timeline to create a convincing lip sync.
I found the best way to create a realistic lip sync was to work from personal reference. I recorded myself multiple times reciting the phrase- fast and naturally, slowly and precisely, accentuating the mouth movements and with different emotion. Once I was happy with my reference footage I began working on my lip sync, working between assumption and common sense, and the reference footage.
Here was my first lip sync test:
I did the first test without any facial animation, solely focusing on the lip sync and animation of the mouth. Making sure to replicate the natural movement of the lips, teeth and tongue by keeping the shapes asymmetrical. I tried to keep the movements realistic and true to life as opposed to an exaggeration.
I then began to add facial animation, tilting the head slightly and giving it more free movement as it is rare that when interacting with something we will keep our head still. When I tilted the head, I changed the expression slightly by changing the expression of the eyebrows, squinting the eyes and I kept the pupils facing the centre point. I felt that this added a more natural feeling touch to the lip sync and animation.
Here is my finished lip sync:


Morpheus Rig: Posing the Rig
I used my customised rig to create a variety of dynamic poses which expressed various emotions and gave character to the rig. I created an ecstatic/happy pose, a distraught/sad pose, a confident/flirty pose and an unimpressed/sassy pose, each accompanied by a 3D rotation turntable to fully exhibit each pose.
Happy

Sad

Flirty

Sassy

Morpheus Rig: Customising the Rig
We were asked to download the Morpheus Rig for our character performance unit. The rig was easily customisable and we were given the task of creating our own unique character by changing the pre-set features of the face, hair and body.
This is the original Morpheus file without any alteration:
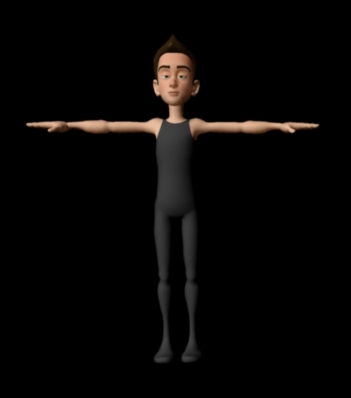
And this is is my customised 'Morphy' character:

I changed the body shape to a more feminine one with curves, emphasising the chest and hips. I decided on a darker olive skin tone, changed the hair to red and gave the bodysuit a slight green hue. I made the nose more defined and narrow, the lips wider and fuller ,and the eyes and pupils larger and more deep set in to the face. All of this combined created a feminine rig with features that are suggestive of youth, beauty and innocence.
As well as altering the 3D features of the character rig, I also took the face map and painted over it in 'Paint Tool Sai' using a graphics tablet. I added a dark tint and hand drawn eyelashes around the eyes and a darker terracotta red coloured lip to make the character seem more womanly and feminine. I also added slightly pink blushed cheeks with freckles to make her appear more innocent and youthful. Here is a before and after of the face map.

Wednesday, 9 April 2014
Life Drawing: Triangular Proportion Exercise
Today was our first life drawing session of the term. It was a chance for us to brush up on our technical drawing skills focusing particularly on practising proportion and scale using a new technique of triangulation. We were given the image below by our tutor showing the recording of a human figure through a number of overlapping shapes. Today we focused on the far left image, depicting a figure made up of triangular shapes. Although sharp lines such as this are not often associated with the human form, rather circular and curved shapes, the subject is still easily identifiable as the human figure. We discovered that this is also a fast and beneficial way to block out the main shape of the figure before defining and detailing and the use of triangles can create the base for a stocky, masculine or heroic character.

We were asked to identify artists who have used methods similar to the triangular technique to create their work. My first thought was of Georges Braque who is most well-known for his cubist painting, 'Violin and Candlestick' exhibiting a surreal collage of angular lines and brassy colours. He harnesses the technique well, creating a new aspect to a somewhat otherwise uninteresting theme by recording a curved object as something new, and at the time previously unseen. Similar to when the technique is applied to the human form, the technique allows the object to still be recognisable but still retains its unique structure.
The same applies to a second piece of his 'Study of a Nude' in which he has applied the same cubic principles, however preserving a more realistic look. Although the lines are more of a contour than whole shapes, the basic triangular pattern can still be seen in the overall structure of the composition.
The same applies to a second piece of his 'Study of a Nude' in which he has applied the same cubic principles, however preserving a more realistic look. Although the lines are more of a contour than whole shapes, the basic triangular pattern can still be seen in the overall structure of the composition.
 |
| Georges Braque- 'Violin and Candlestick' |
 |
| Georges Braque- 'Study of a Nude' |
Pablo Picasso is also an avid user of this method. Famous for his angular portraits, Picasso used the method of triangulation in many of his works. For example, the painting 'Les Demoiselles d’Avignon' is an accurate portrayal of such a technique, depicting a group of women standing in nude. Unlike Braque, the painting is made up of block colours as opposed to lines, yet it still stays true to the cubist style in both the execution of the female's shape and the varying coloured background.
The second piece I chose from the works of Picasso is 'Standing Female Nude'. Although the piece is almost impossible to comprehend as a real form, he has used the method of enhancing the form through angular shapes to the utmost extreme. In this case, Picasso has chosen to have this as his final piece, however in terms of applying the method to life drawing, this could be used as the basis to add more curvature and detail at a later point.
 |
| Pablo Picasso- 'Les Demoiselles d’Avignon' |
 |
| 'Pablo Picasso- 'Standing Female Nude' |
Marcel Duchamp is yet another artist who I believe is inspired by the use of angular shapes to create his artwork. Duchamp is known for his paintings which depict a strong sense of movement through a succession of images layered over one another; his work looks as if he is studying instruments, however they are in fact replications of the human figure. His piece, 'Nude Descending a Staircase' depicts exactly that, through the use of rough, overlapping lines and shapes harnessing both Braques' use of lines and Picasso's use of block colour.
His style is continuous and almost identical in his piece 'Sad Young Man in a Train' , where he has created another image succession painting. The subject is apparent, however extremely stylised because of the application of the triangulation technique. He has captured the essence of the pose as well as highlighting the masculine and obviously male figure through the use of sharp lines.
 |
| Marcel Duchamp- 'Nude Descending a Staircase' |
 |
| Marcel Duchamp- 'Sad Young Man in a Train' |
To get a more modern example, the class looked at the opening sequence for 'Batman: The Animated Series'. There was strong evidence of the use of triangular shapes being used throughout the whole opening. Light seems to be an important factor in the design of the sequence, so triangles were used to create parts of harsh contrast between dark and light falling on body parts such as the face and shoulders. One of the last shots shows a strike of lighting hit behind the hero, exposing him fully for the first time. Strong angular lines are used, particularly in his legs possibly to give a sense of weight, to exhibit his masculinity and heroic nature.
We began the practical work of the lesson with some 30 second warm up sketches. Our model changed into a variety of dynamic poses and we used the exercise as a way to loosen up and get back into the swing of getting down as much artistic information as possible speedily and efficiently. Here are my 30 second warm up sketches:

We then used the triangulation method to produce life drawings that capture the essence, basic shape and weight of the form. I enjoyed using this method as it was easy to get down when only little time was available. I found that the technique made my quick sketches more dynamic and allowed me to stretch the figure, however still encompassing the natural flow of the pose Here are my sketches:


Lastly, the class did some 10 minute tonal drawings. I decided to use a cross-hatch method to get the shading down quickly and loosely without being too precise. I used a pencil to measure the angles in the first instance, creating a quadrilateral of varying degrees, before blocking out the general shape and then adding in the cross-hatches lightly at first and then enhancing the shadow in areas where I felt it was needed.

Subscribe to:
Comments (Atom)